Are your hockey photos turning out blurry, dark or noisy? If your answer is yes, this post is for you. It provides recommended settings to help you improve your hockey photography in various lighting conditions. These settings will work for various fast-paced indoor sports like hockey, basketball, volleyball, and indoor soccer.
Let’s start with basic camera settings you can use for hockey photography:
| Setting | For Great Indoor Light | For Poor Indoor Light | ||||
|---|---|---|---|---|---|---|
| Shooting Mode | Manual | Manual | ||||
| Shutter Speed | 1/1000 | 1/500 – 1/800 | ||||
| Aperture | f/2.8 – f/4 | f/2.8 | ||||
| ISO | 1600 | 1600 – 3200 | ||||
| Focus Mode | Continuous | Continuous | ||||
| Area Mode | Zone / Group-Area | Zone / Group-Area | ||||
| Image Format | JPG | RAW | ||||
| White Balance | Manual | Manual |
The basic settings listed above provide a great starting point for most scenarios. These will work with a wide range of cameras and lenses. Let me show you what they will do for you and how to tweak them to improve your shots.
Using manual shooting mode gives you more control and consistency

The manual shooting mode, available in DSLR and mirrorless cameras, allows you to fix-in your preferred values affecting exposure: Shutter speed, aperture and ISO. In this mode, your camera will maintain these values until you change them.
The light available in typical indoor ice arenas provides consistent illumination across the ice. Therefore, you can manually set your preferred values for proper exposure, point your camera towards the ice and take a few test shots. Once you are happy with those settings, you won’t have to worry about them too much for the rest of the game. The exposure will be consistent across all of your action shots.
You may want to check your settings every now and then if your camera does not have a lock feature. This is to make sure you did not accidentally change any of them. If you need to fix image exposure later in post-processing software, you can use software features to adjust multiple photos at the same time.
When not to use manual shooting mode
There’s two scenarios where manual shooting mode may not be the best option for you:
- When you want to quickly switch back and forth between game action (in bright light) and fan shots (in poor light) without worrying about settings.
- When brightness levels across the arena are too inconsistent, requiring additional work later to fix in post-processing software.
For these cases, some photographers prefer to change the shooting mode from manual mode to aperture priority mode and allow the camera to dynamically adjust the shutter speed down to a minimum value of your choice. This approach can work well since shots of game fans do not require a very fast shutter speed.
However, the danger of using aperture priority mode in hockey games is that you may end up with inconsistent exposures. This is prevalent because of the high contrasts you will find across the home team white jerseys, the away team darker jerseys, dark hockey gear, and the ice surface.
For example: In one photo, the camera may react to a dark helmet and give you a bright exposure. In the next photo, the camera may react to a bright spot of ice and give you a dark exposure. These can be painful to edit later in post-processing software because you are forced to fix the exposure of hundreds of photos one at a time.
Other options include the shutter priority mode and the auto ISO feature. These are used to let the camera dynamically adjust aperture and ISO values respectively. Unfortunately, if you are shooting hockey in poor light, your aperture and ISO settings are already set at their maximum acceptable limits (f/2.8 and ISO 3200). The shutter priority mode and the auto ISO feature may become more useful when shooting indoor sports with great light.
Using a fast shutter speed lets you freeze game action

In general terms, the shutter speed setting tells the camera the amount of time to keep the shutter(s) open when taking a photo. The mechanics behind this feature are more complex in some cameras, but this illustrates its purpose.
In order to freeze game action, we need to set the shutter speed parameter in our camera to a very short period. For a fast-paced sport like hockey, an ideal shutter speed value would be 1/1000th of a second. That will freeze action in a well lit ice arena and let you keep ISO under 1600 (which will help you keep image noise under control.)
However most youth hockey games are played indoors with poor lighting. For the worst cases, the settings in the table above will still allow your camera to underexpose your shots a little and be able to recover details later in post-processing software. Your shots may look a bit dark on your camera, but you can then fix the RAW image files in post-processing software (like Lightroom, Capture One, or Luminar.) This is better than blurry photos because notion blur effects cannot be fixed in software.
Using wider apertures allows you to choose faster shutter speeds and helps you isolate your subject (player of interest)

The aperture setting tells the camera how wide to open the lens shutter(s) relative to the lens focal length (yes, that sounds like a tongue-twister.) Wider apertures allow more light at a time to reach the camera sensor. This means the shutters do not have to stay open for long to get enough light for your needs. In other words: Wider apertures allow you to use faster shutter speeds… and fast shutter speeds are needed to freeze hockey action.
A wide aperture can produce a shallow depth of field (DoF). This is the space around your focal point in which objects will appear sharp; The rest of the space shown in your image will seem out of focus. This effect allows you to isolate your main subject from distracting elements. For example, if you focus your camera on the helmet of the player driving the hockey puck, a shallow depth of field allows you to keep players in front of and behind of your player-of-interest to stay out of focus. This can transform a potentially busy photo into a pleasing one.
What’s the challenge behind choosing a fast aperture of f/2.8? The short answer is “cost”. The difference in retail price between (let’s say) a 200mm f/2.8 lens and a 200mm f/4 lens can be twofold. The first one will work for all ice arenas, while the latter may not.
Using continuous mode allows you to track players and keep them in focus as they skate

When your camera auto focus system is set to continuous
mode, and you (for example) press the shutter button half way, the camera will begin tracking a subject in its field of view. It will try to keep the subject in focus as it moves until you release the button.
When you are later ready to take the picture, finish pressing the shutter button all the way down. The camera will be able to snap the photo without much delay. This is because it has been tracking your subject for a while now. Therefore, continuous mode allows your camera to react much faster to your intent to snap a photo.
Unfortunately this is another area in which your mileage may vary a lot based on your camera gear. The efficiency of the auto focus system relies on various camera and lens capabilities. Some cameras can track fast moving hockey players across the ice; Other cameras can lose tracking quickly if another skater crosses your line of sight; Finally, some camera and lens combinations are not fast enough to track subjects moving straight towards you or away from you.
The good news is that there are multiple techniques you can use in conjunction with continuous mode to help your auto focus system work better for you. Check out advanced techniques linked at the end of this post.
Zone based area modes tell your camera to pay attention to a subset of focus points for faster focusing
Different camera vendors provide different auto focus area modes. However, most DSRLs and mirrorless systems provide equivalents for the following: Single-point, group-area or zone, and full 3D tracking modes.
On one extreme, the single-point mode can provide great results when a skater is moving straight towards you or away from you. However, as the skater changes direction across the ice, it becomes much harder to keep that one focus point on the player all the time. This may drastically change focus as that point leaves the skater, moves over the boards 10 feet behind her and then back on the player. This becomes inefficient for your camera gear causing it to waste valuable time refocusing.
On the other extreme, a full 3D tracking mode will use the entire frame and try to guess what you want to focus on. However on a busy frame, the camera may find four or five players at different focal distances, making it difficult to guess which of those players you want to focus on. 3D tracking modes are more useful when the action is constantly entering and exiting an otherwise static frame (e.g. which may happen when photographing birds in flight.)
That’s why the group-area or zone types of modes may be more efficient for your camera when shooting indoor sports. In these modes, you can select a smaller area (for example) in the center of your view finder, and the camera will pay attention to those focus points. This strategy allows you to tell the camera “hey, focus on whoever you find in my selected zone; I’ll do the rest.” The strategy is a bit more forgiving as you track your player of interest, making sure she stays within your selected zone.
This is another area where you can experiment and test your camera capabilities. For example, the 3D tracking mode on my Nikon 5D camera was really efficient, so I used it for many years. I got used to quickly releasing and depressing my focus button whenever tracking failed (which didn’t happen often). On the other hand, the tracking mode on my Nikon D610 (after firmware updates) was never good enough for the task, so using a zone mode worked much better.
Keep in mind that newer cameras may include additional features tailored to sports photography. For example, my Fujifilm X-T3 mirrorless camera has extra options to customize sensitivity when tracking a player to help address the issues described above.
Using the RAW image format makes it easier for you to fix exposure and white balance issues later in software

When shooting hockey in ice arenas with great light, it’s easier to consistently freeze action at the right exposure from your camera. In these cases, you may not need to do any post-processing work in software; You could safely setup your camera to save image files in JPEG format. Your camera can generate and write JPEG files faster than RAW files. JPEG files also take less space in your storage card.
However when shooting hockey in extremely poor light, you have the option of underexposing your shots a little in order to keep your desired shutter speed and ISO values. For these cases, you want to set your camera to store image files in its vendor-specific RAW format. RAW formats will include more data than a JPEG format. The files will be larger, but they will help you to fix exposure issues in post-processing software while recovering details from the shadows.
Using Manual white balance helps maintain color consistency
A degraded mix of light fixtures working at different cycles can result in all sorts of color casts on your photos. This may not be a big issue in a well lit professional ice arena, but the results can be noticeable when shooting in your local arena.
Using AUTO white balance may work well enough for a few cameras. However, in most cases this will result in different color temperatures from photo to photo. One photo may look perfect, and the next may look too warm or too cold. For more consistent results, set the camera to use a custom white balance while shooting at a well lit and balanced ice area.
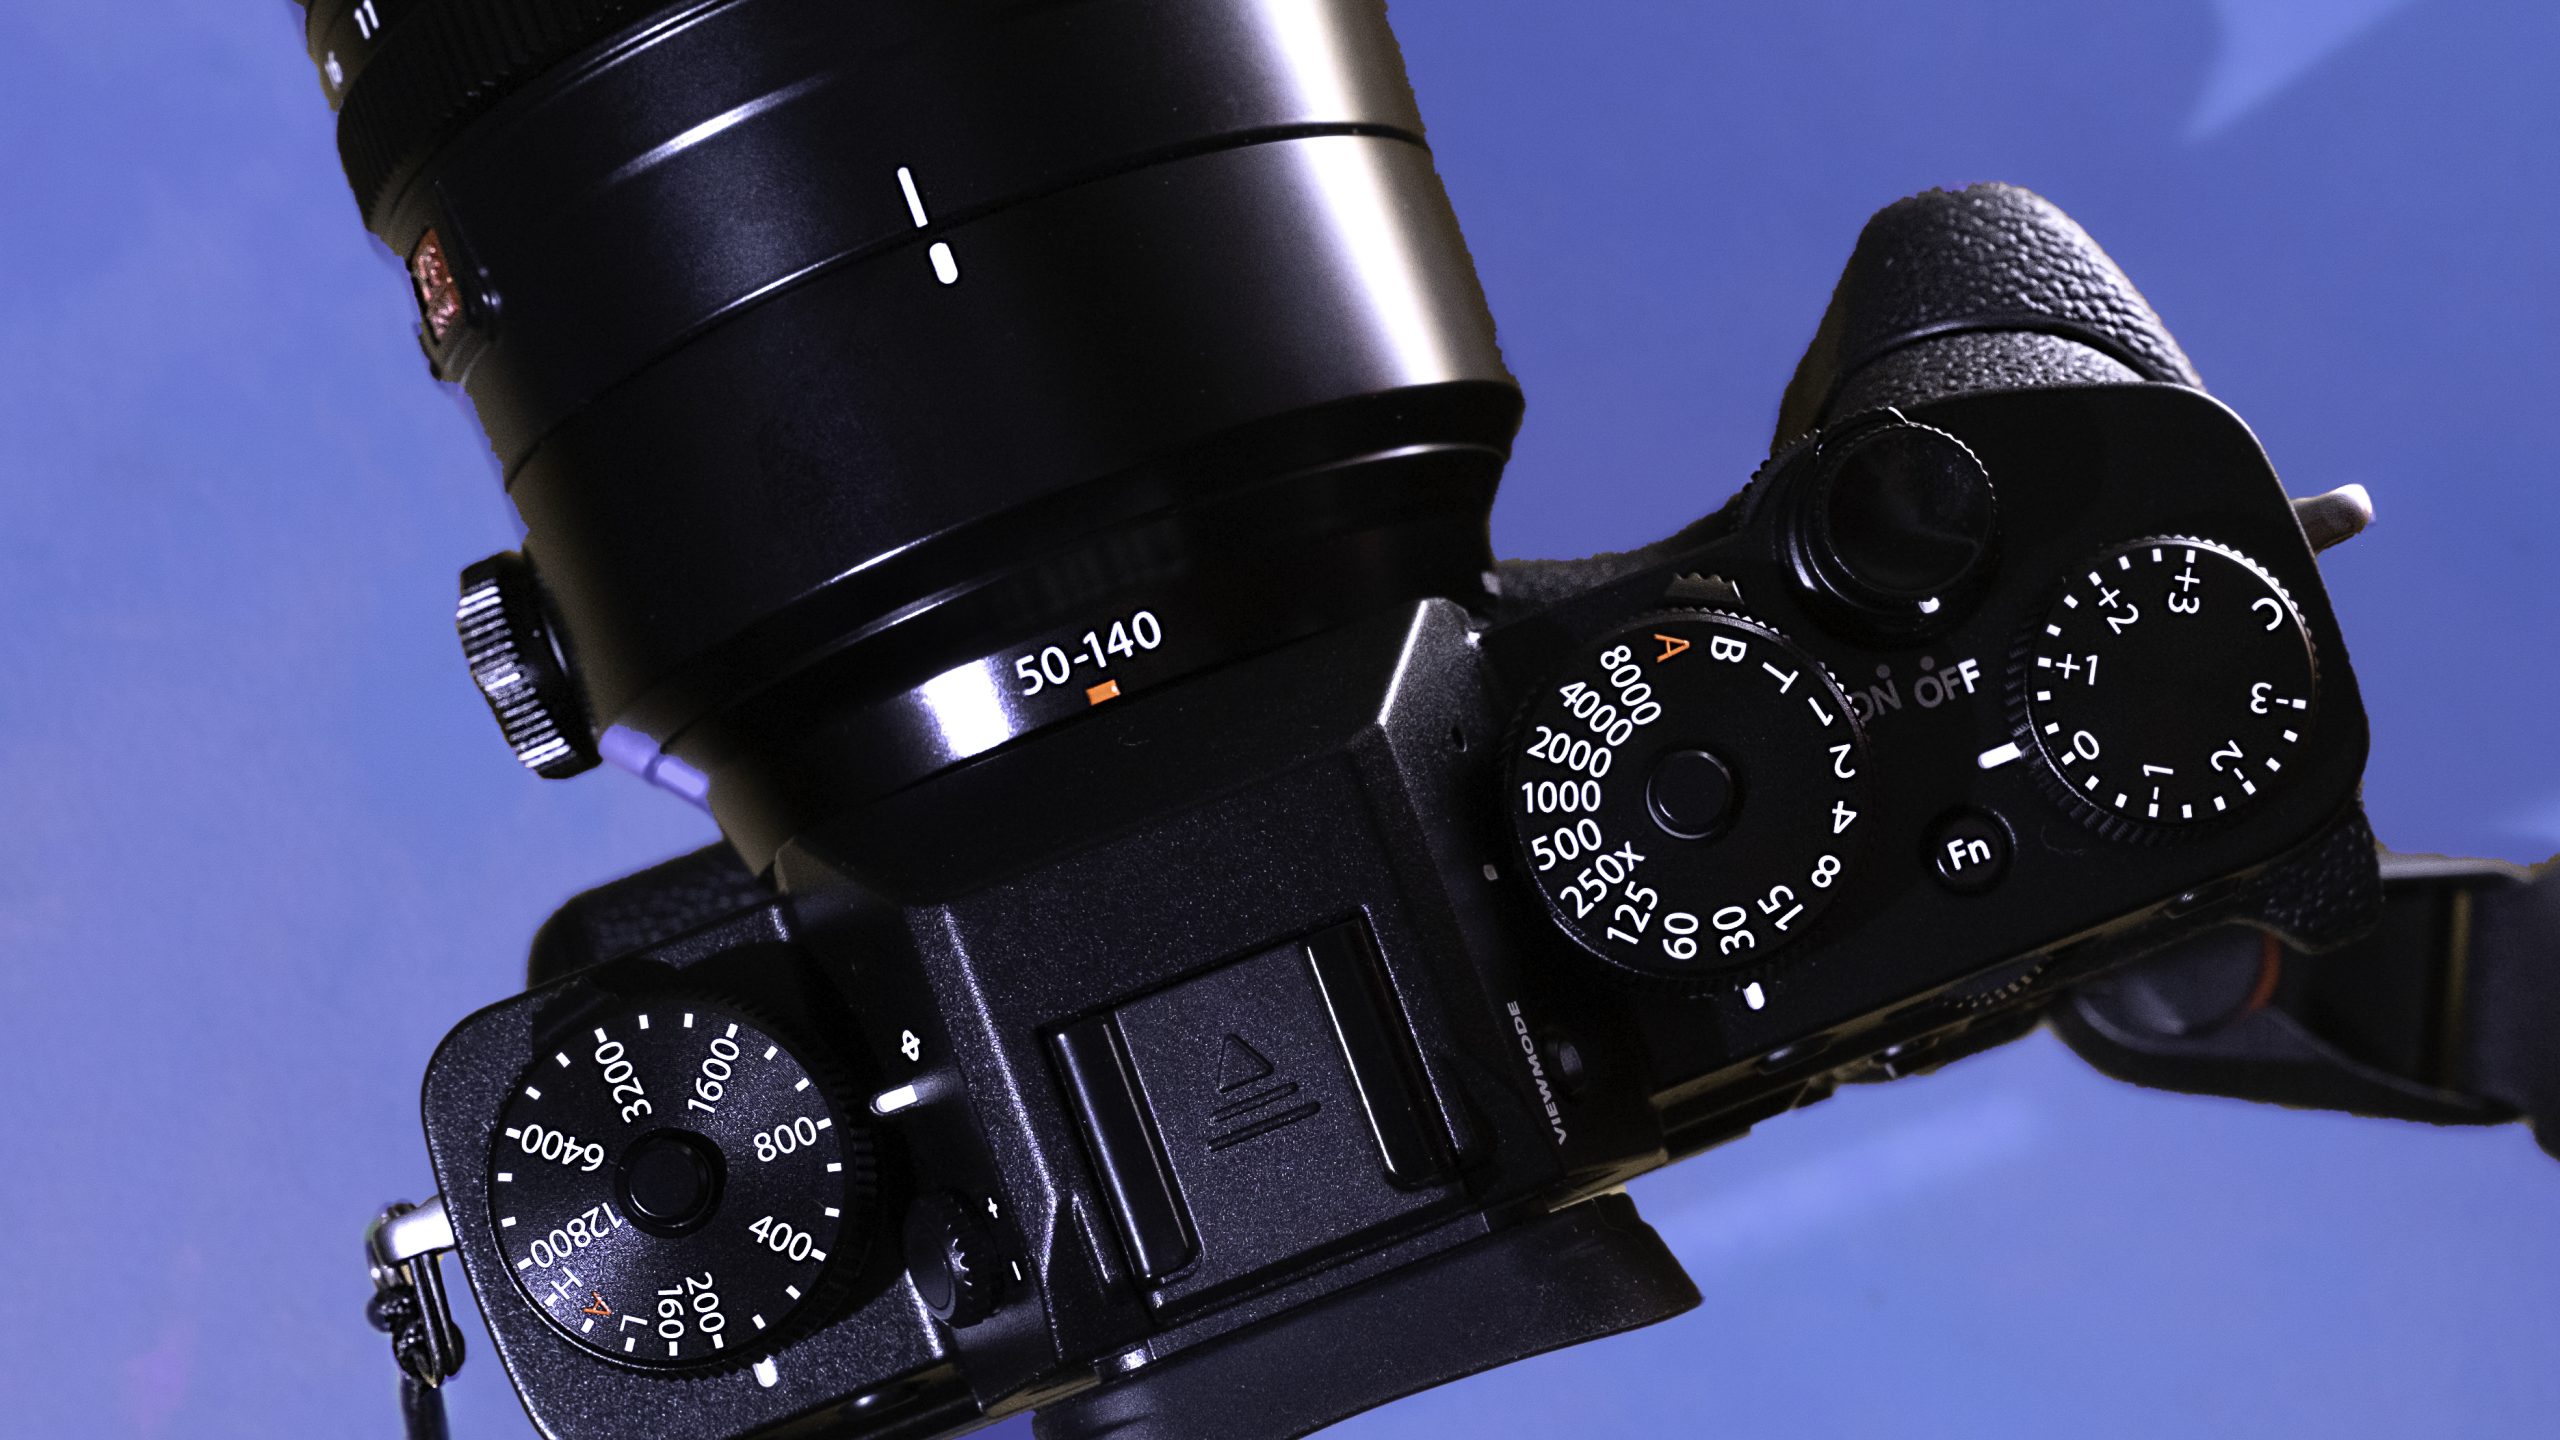
Each camera has a different way of setting a custom white balance reference. For example on a Fujifilm camera like the X-T3, you can select the white balance menu, select an empty slot (1-3), then take a shot of a wide patch of ice. As soon as you press the shutter, the white balance adjustment will be saved. For even more control, you can instead press the joystick in order to apply minor color tweaks before pressing the shutter speed.
On a Nikon camera like the D5, the process is a bit more involved: Press the white balance (WB) button, select preset mode (PRE) using the dial, select an empty slot (1-6), press the WB again until the “PRE” indicator starts the flash, then press the shutter button to apply the new white balance reference.
Check out these posts for more techniques and resources:
- What is the best lens for hockey photography?
- What is the best location around a rink to shoot hockey photos?
- Top 3 easy tips to take sharp hockey photos
- How to set a custom white balance?
- How to fix exposure of multiple photos at a time in Lightroom?